
Advanced Module – Word Processing
Lesson 1 – Advanced Document Setup and Formatting Concepts
This lesson introduces the essential setup tools required for creating long, structured and professional documents.
It supports the ICDL Advanced Documents syllabus by teaching accurate control of spacing, pagination, columns, page layout and consistent formatting.
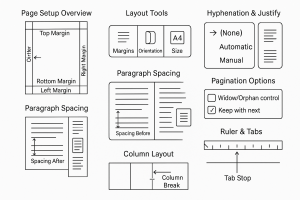
1. Page Setup Overview
Page setup determines the overall layout of your document and should be configured before applying detailed formatting.
- Margins – white space around the page.
- Orientation – Portrait or Landscape.
- Paper size – e.g., A4, A3.
- Gutter – extra space added for binding.
Diagram – Page Setup Overview
How to open Page Setup
- Go to the Layout (or Page Layout) tab.
- Locate the Page Setup group.
- Select Margins, Orientation or Size, or click the dialog launcher for full options.
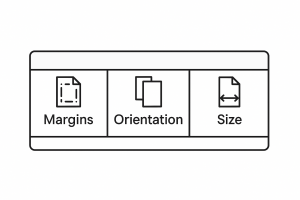
2. Adjusting Margins, Orientation and Paper Size
To change margins:
- Open the Layout tab.
- Select Margins.
- Choose a preset or select Custom Margins… to enter specific values.
To change orientation:
- Go to Layout > Orientation.
- Select Portrait or Landscape.
To change paper size:
- Go to Layout > Size.
- Select A4 or another required size.
Diagram – Layout Tools
3. Line Spacing and Paragraph Spacing
Consistent spacing improves readability and ensures documents remain accessible and professional.
To set line spacing:
- Select the text.
- Open the Paragraph group from the Home tab.
- Click Line and Paragraph Spacing and choose a preset or Line Spacing Options.
To set spacing before/after paragraphs:
- Select the paragraph.
- Open Line Spacing Options.
- Adjust Spacing Before and Spacing After.
Tip: Use paragraph spacing instead of multiple blank lines. This supports good design and accessibility
Diagram – Paragraph Spacing

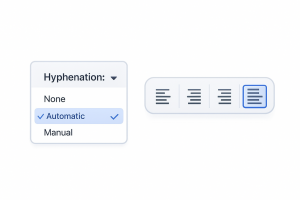
4. Hyphenation and Justification
To enable hyphenation:
- Open the Layout tab.
- Select Hyphenation.
- Choose Automatic or Manual.
To justify text:
- Select the paragraph.
- Choose the Justify option from the alignment tools.
Diagram – Hyphenation & Justify
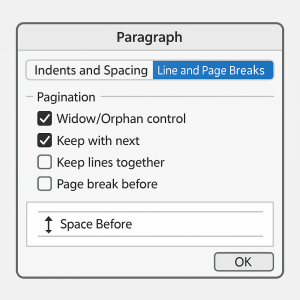
5. Widows, Orphans and Keep Options
These advanced pagination controls prevent awkward breaks in long documents, supporting professional document flow.
To control widows/orphans:
- Select the paragraph.
- Open the Paragraph dialog.
- Select Line and Page Breaks.
- Tick Widow/Orphan control.
To keep headings with paragraphs:
- Select the heading.
- Open Paragraph → Line and Page Breaks.
- Tick Keep with next.
Diagram – Pagination Options
6. Columns (Multi-Column Layout)
To apply columns:
- Select the text/section.
- Go to Layout > Columns.
- Select Two, Three, or More Columns….
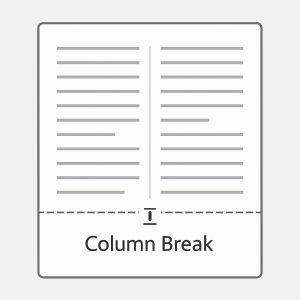
To insert a column break:
- Place your cursor at the point where the next column should start.
- Go to Layout > Breaks.
- Select Column Break.
Diagram – Column Layout
7. Line Numbering and Borders
To add line numbers:
- Go to Layout > Line Numbers.
- Choose Continuous or Restart Each Page.
To add a page border:
- Open the Design tab.
- Click Page Borders.
- Select style, colour and width, then apply.
8. Using the Ruler and Tabs
To show the ruler:
- Go to the View tab.
- Tick Ruler.
To set tabs:
- Click on the ruler to place a tab stop.
- Press Tab to move to it when typing.
Tip: Tab stops provide accurate alignment—avoid using spaces.
9. Good Practices for Advanced Layout
- Use paragraph and line spacing, not blank lines.
- Use sections for different layouts (e.g., landscape page in a portrait document).
- Use Styles for consistent, document-wide formatting.
- Check Print Preview regularly.
10. Practical Activity
- Create a 3-page document with headings and paragraphs.
- Set custom margins and change orientation on one page.
- Apply 1.5 line spacing and proper spacing before/after headings.
- Enable hyphenation and justify text.
- Apply Widow/Orphan control and Keep With Next.
- Convert a page into two columns and insert a column break.