
Advanced Spreadsheets
Lesson 8 – Auditing, Protection and Macros
This lesson covers tools for auditing formulas, protecting worksheets and workbooks, and recording simple macros to automate repeated tasks. These skills help you keep spreadsheets accurate, secure and efficient.

1. Formula auditing
Formula auditing tools help you understand how a result is calculated and identify where errors come from.
- Show precedents (cells feeding a formula) to see which inputs affect the result.
- Show dependents (cells depending on a formula) to see which cells rely on a given result.
- Trace errors, following arrows back through the cells involved until the source of the problem is found.
- Use tools such as Evaluate Formula (where available) to step through a formula part by part.
- Display all formulas in the worksheet to review logic instead of results (for example, using Show Formulas).

2. Error checking and handling
Error checking helps you recognise and manage common formula errors.
- Recognise common error codes:
- #DIV/0! – division by zero.
- #VALUE! – wrong type of argument (for example, text instead of number).
- #REF! – invalid cell reference, often caused by deleting referenced cells.
- #NAME? – unrecognised function or named range, often due to a spelling error.
- Use sensible error-handling formulas such as:
- =IFERROR(formula, “Check data”) – display a friendly message if the formula returns an error.
- Correct the underlying problem where possible, rather than always hiding errors.

3. Protecting data
Protection features reduce the risk of accidental changes to formulas, layouts or workbook structure.
- Lock and unlock specific cells, such as locking formula cells while leaving data entry cells unlocked.
- Protect a worksheet with a password (optional) to prevent accidental changes to locked cells.
- Protect a workbook structure to stop users adding, deleting, hiding or moving sheets.
- Understand the difference between:
- Protection – controls editing within the workbook.
- File-level encryption / password to open – prevents unauthorised access to the file itself.

4. Sharing and file security
Sharing and file-level security options help control how others can view and edit your workbook.
- Use “Open as Read-Only” where appropriate to discourage permanent changes.
- Save a workbook with a password to open (file encryption) to protect sensitive information.
- Use a password to modify if you want people to view the file but not change it without permission.
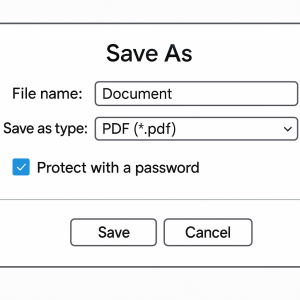
- Save a copy in PDF format for distribution so that layout and content cannot be easily edited.
5. Recording simple macros
Macros record a sequence of actions so they can be repeated automatically, saving time on routine tasks.
- Understand that a macro is a recorded sequence of commands and clicks that can be replayed.
- Record a simple macro, for example:
- Applying standard formatting to a data range (bold heading row, borders, number formats, column widths).
- Choose where to store the macro (current workbook or personal macro workbook, where available).
- Assign a macro to:
- A button or shape on the worksheet.
- A custom toolbar/ribbon button or shortcut key (where permitted).
- Run a macro to repeat the recorded task with a single click or shortcut.
- Understand security warnings about macros and the concept of trusted locations and macro security settings.

6. Good practice with macros
Good macro practice reduces risk and helps keep workbooks stable and secure.
- Record macros in a copy of the workbook first, so you can revert if anything goes wrong.
- Give macros meaningful names (no spaces) so their purpose is clear, for example Format_ReportTable.
- Add comments or a simple documentation sheet describing what each macro does.
- Avoid running macros from untrusted sources, as they may contain harmful code.
- Store important macro-enabled workbooks in trusted, secure locations.

7. Practical Activity
Complete this activity to apply the lesson skills.
- Open a worksheet with one or more complex formulas and use Trace Precedents to follow the arrows from the result cell back to the input cells.
- Use Trace Dependents on a key input cell to see which results rely on it.
- Protect a worksheet so that only designated data entry cells can be edited while formulas remain locked.
- Save the workbook as a PDF for sharing with others.
- Record a macro that formats a data table (bold heading row, borders, and number formatting for currency columns).
- Assign the macro to a button on the sheet and test it by applying the formatting to an unformatted copy of the table.
