
Advanced Module – Databases (Access)
Lesson 8 – External Data, Macros and Final Database Tools
This final lesson covers importing and exporting data, linking to external sources, using simple macros for automation, and maintaining a database through compacting, splitting and backup. These skills are essential when preparing an Access database for real-world use.
1. Importing data
You can import data from Excel, text files, CSV, XML, other Access databases and more. Importing creates a local copy of the data inside your database.
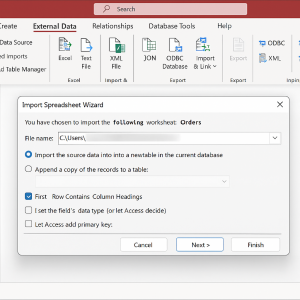
How to import from Excel
- Go to External Data > New Data Source > From File > Excel.
- Browse to locate the workbook and click Open.
- Choose to Import the data into a new table or append to an existing table.
- Follow the wizard to confirm field names, data types and primary key options.
- Finish and review the imported table.
2. Linking to external data
Linking does not copy data into Access. Instead, Access reads the data directly from the source file.
- Ideal for shared Excel workbooks or external databases.
- Changes in the source file automatically appear in Access.
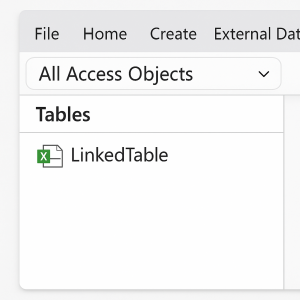
How to link to an Excel file
- Go to External Data > New Data Source > From File > Excel.
- Select Link to the data source by creating a linked table.
- Complete the wizard and finish.
3. Exporting data
You can export tables, queries, reports and forms to Excel, text, PDF or XPS for sharing and analysis.

- Select the object in the Navigation Pane.
- Go to External Data and choose the export format (Excel, Text, PDF/XPS).
- Follow the wizard to save the file.
4. Introduction to macros (UI macros and data macros)
Macros automate tasks without needing VBA coding.
- UI macros – linked to forms, reports or controls (e.g. buttons).
- Data macros – linked to table events (e.g. Before Change, After Insert).

Example UI macro: Button to open a form
- Open a form in Design View.
- Add a Button control.
- Use the wizard: Form Operations > Open Form.
- Choose a form, confirm details and finish.
- Access automatically writes the UI macro behind the button.
Insert Image Placeholder: Command Button Wizard (Open Form)
5. Macro safety
- Only enable macros from trusted locations.
- Use macros to automate routine tasks—not to bypass security settings.
- Be cautious with data macros, as they can change data automatically.
6. Compacting and repairing the database
The Compact and Repair tool reduces file size, removes temporary data and can fix minor corruption.
Insert Image Placeholder: Compact & Repair Database screen
- Close all open objects.
- Go to File > Info.
- Click Compact & Repair Database.
7. Splitting the database (overview)
Splitting separates the database into two parts:
- Back-end – tables and data (shared file on a server).
- Front-end – queries, forms, reports and macros (on each user’s computer).

How to start the Database Splitter (where available)
- Go to Database Tools.
- Select Access Database or Split Database.
- Follow the wizard to create the back-end file and generate linked tables.
8. Backup and security basics
- Create regular backups of your database (and the back-end if split).
- Store backups in a secure location such as a network drive or cloud service.
- Use Windows folder permissions to restrict access to sensitive data.
- Consider password protection or IT-managed access controls.

9. Final checks before deployment
- Test all forms, queries, reports and macros thoroughly.
- Confirm that relationships and referential integrity are correctly enforced.
- Remove temporary or test data.
- Run Compact & Repair before distribution.
- Provide a navigation form or switchboard for end users.

10. Practical Activity
- Import data from an Excel file into a new table.
- Link to a second Excel workbook as a linked table.
- Export a query to Excel.
- Add a button to open a report using a UI macro.
- Run Compact & Repair on your database.
- Make a backup copy of your database and save it in a separate folder.