
Advanced Module – Word Processing
Lesson 6 – Advanced Find, Replace and Document Automation
This lesson teaches you how to quickly search, replace and automate content in long documents. These features save time, reduce errors and help you manage professional reports efficiently.
1. Advanced Find
The Find tool helps you locate words, phrases or specific formatting anywhere in your document.
How to use Advanced Find:
- Press Ctrl + F to open the Navigation Pane.
- Type the word or phrase you want to find.
- Click through the results to jump to each location.
Using advanced search settings:
- Go to Home → Find → Advanced Find.
- Click More to show advanced options.
- You can search for:
- Bold or italic text
- Specific fonts
- Paragraph formats (e.g., centred)
- Specific Styles (e.g., Heading 1)

2. Advanced Replace
The Replace tool allows you to update words, phrases or formatting across the whole document.
How to replace text:
- Go to Home → Replace.
- Type the existing text in Find what.
- Type the new text in Replace with.
- Select Replace or Replace All.
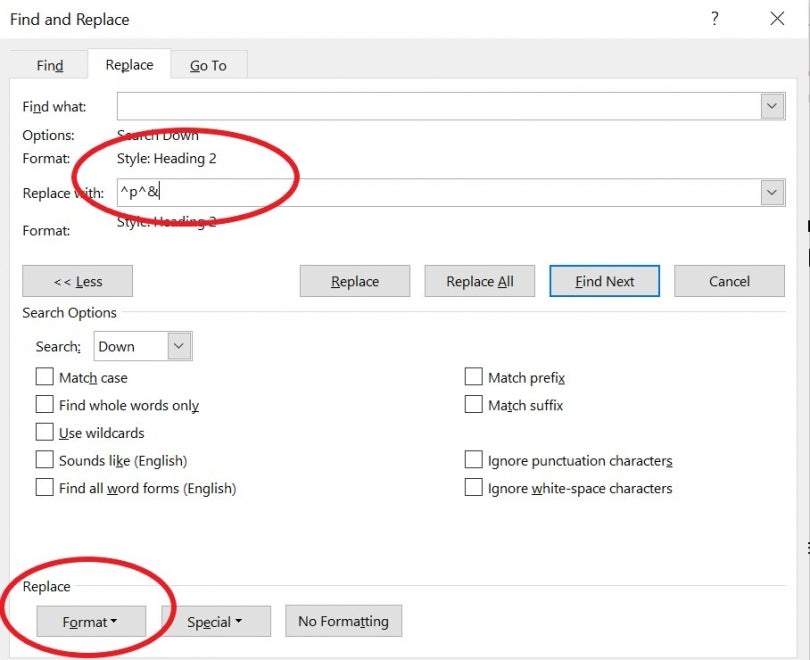
Replace formatting:
- Click inside the Find what box.
- Select Format and choose the formatting to find (e.g., Bold).
- Click inside the Replace with box.
- Choose a new format (for example: “Heading 2”).
3. Using Wildcards (Pattern Searches)
Wildcards let you search for patterns instead of exact text — useful for correcting repeated formatting issues.
Examples:
- auto* finds: auto, automatic, automobile
- ?ing finds: ring, sing, king
How to enable wildcards:
- Open Advanced Find.
- Click More.
- Tick Use wildcards.

4. Navigation Tools
Navigation tools help you move around large documents quickly.
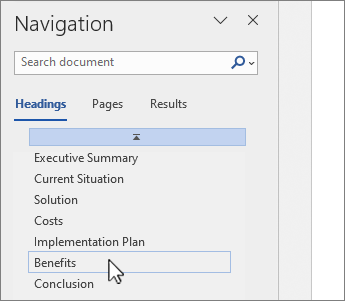
Navigation Pane:
- Press Ctrl + F.
- Select the Headings tab to jump between sections.
- Select the Pages tab to view a page-by-page preview.
Go To:
- Press Ctrl + G.
- Choose what you want to jump to (page, section, bookmark, line, etc.).
5. AutoCorrect
AutoCorrect automatically fixes common spelling mistakes and can insert long phrases using shortcuts.
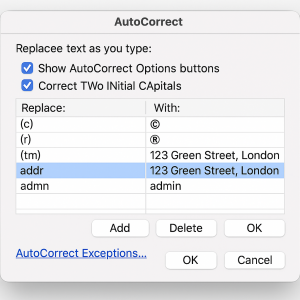
How to customise AutoCorrect:
- Go to File → Options.
- Select Proofing.
- Click AutoCorrect Options.
- Add or edit entries (e.g., typing addr inserts your full address).
6. AutoText & Quick Parts
AutoText and Quick Parts store reusable content such as signatures, disclaimers or repeated headings.
How to save text as a Quick Part:
- Select the text you want to save.
- Go to Insert → Quick Parts → Save Selection to Quick Part Gallery.
- Name your entry and click OK.
How to insert a Quick Part:
- Place the cursor where you want the content to appear.
- Go to Insert → Quick Parts.
- Select your saved item.

7. Bookmarks & Cross-References
Bookmarks mark a specific point in your document. Cross-references let you link to that location.
How to add a Bookmark:
- Select the location in the document.
- Go to Insert → Bookmark.
- Type a clear name (e.g., ResultsSection).
- Click Add.
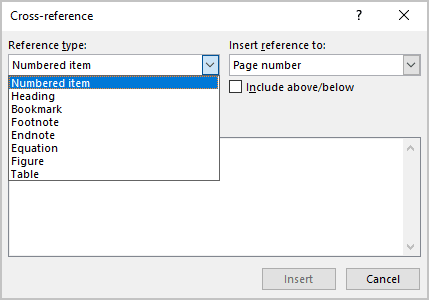
How to add a Cross-reference:
- Place the cursor where the reference should appear.
- Go to Insert → Cross-reference.
- Select the reference type:
- Heading
- Bookmark
- Figure
- Table
- Click Insert.
8. Field Codes (Overview)
Fields display information that updates automatically — useful for dynamic content in reports.
Examples of fields:
- Page numbers
- Date and time
- Cross-references
- Table of Contents
How to update fields:
- Select a field and press F9.
- Or right-click → Update Field.
9. Good Practices
- Use Find/Replace to update content consistently.
- Name bookmarks and AutoText entries clearly.
- Use wildcards for advanced pattern searching.
- Update fields regularly in long documents.
- Use Quick Parts for repeated sections to save time.
10. Practical Activity
- Use Replace to update a term throughout a document.
- Replace all double spaces with single spaces.
- Create an AutoCorrect entry for a long phrase you type often.
- Add a bookmark and create a cross-reference to it.
- Save a signature block as a Quick Part and insert it twice.